Happy Holiday! Get Lifetime 20% off. Use Code DISCOUNT20 at the checkout.
Writing Assistant : Generate Articles
What is Generate Articles tool under Writing Assistant?
“Generate Articles” is tool inside our Ai-Powered writing assistant product. It helps user to generate long articles, blogs, subject base research papers and any other content that a Multilings user is planning to generate. The set of AI features and our in-depth algorithm makes this Article writing tool very useful for our users.

Who is this for?

This tool is for everyone whether it’s a mom-dad or 6 years old kid who knows how to work on the computer. This tool helps you generate any type of article if you know the subject you are looking for. Just input some information and get what you wanted.
This tool is best suitable for blog writers, authors, teachers, professors, researchers as well as students. Get your assignments done in a fraction of second.
Features of “Generate Article” tool
Find best suitable title for your article/ blog.
Generate number of subheadings for your article.
Review and Edit subheadings and add your own subheadings.
Choose your target language.
Choose quality of your article from Standard to premium.
Choose your audience type.
Choose the tone for your article based on your audience.
Once article/ blog generated, you can further edit and save your changes, rephrase the part you don’t like.
You can download the generated article as a pdf.
Every article is saved as a report inside your account which can be referred anytime.
How does “Generate Article” tool work?
Step 1
Once you login to Multilings, click on “Writing Assistant” from the left navigation. This will show you a screen to choose a tool to continue working on Writing Assistant. Choose “Article Generator”.

Step 2
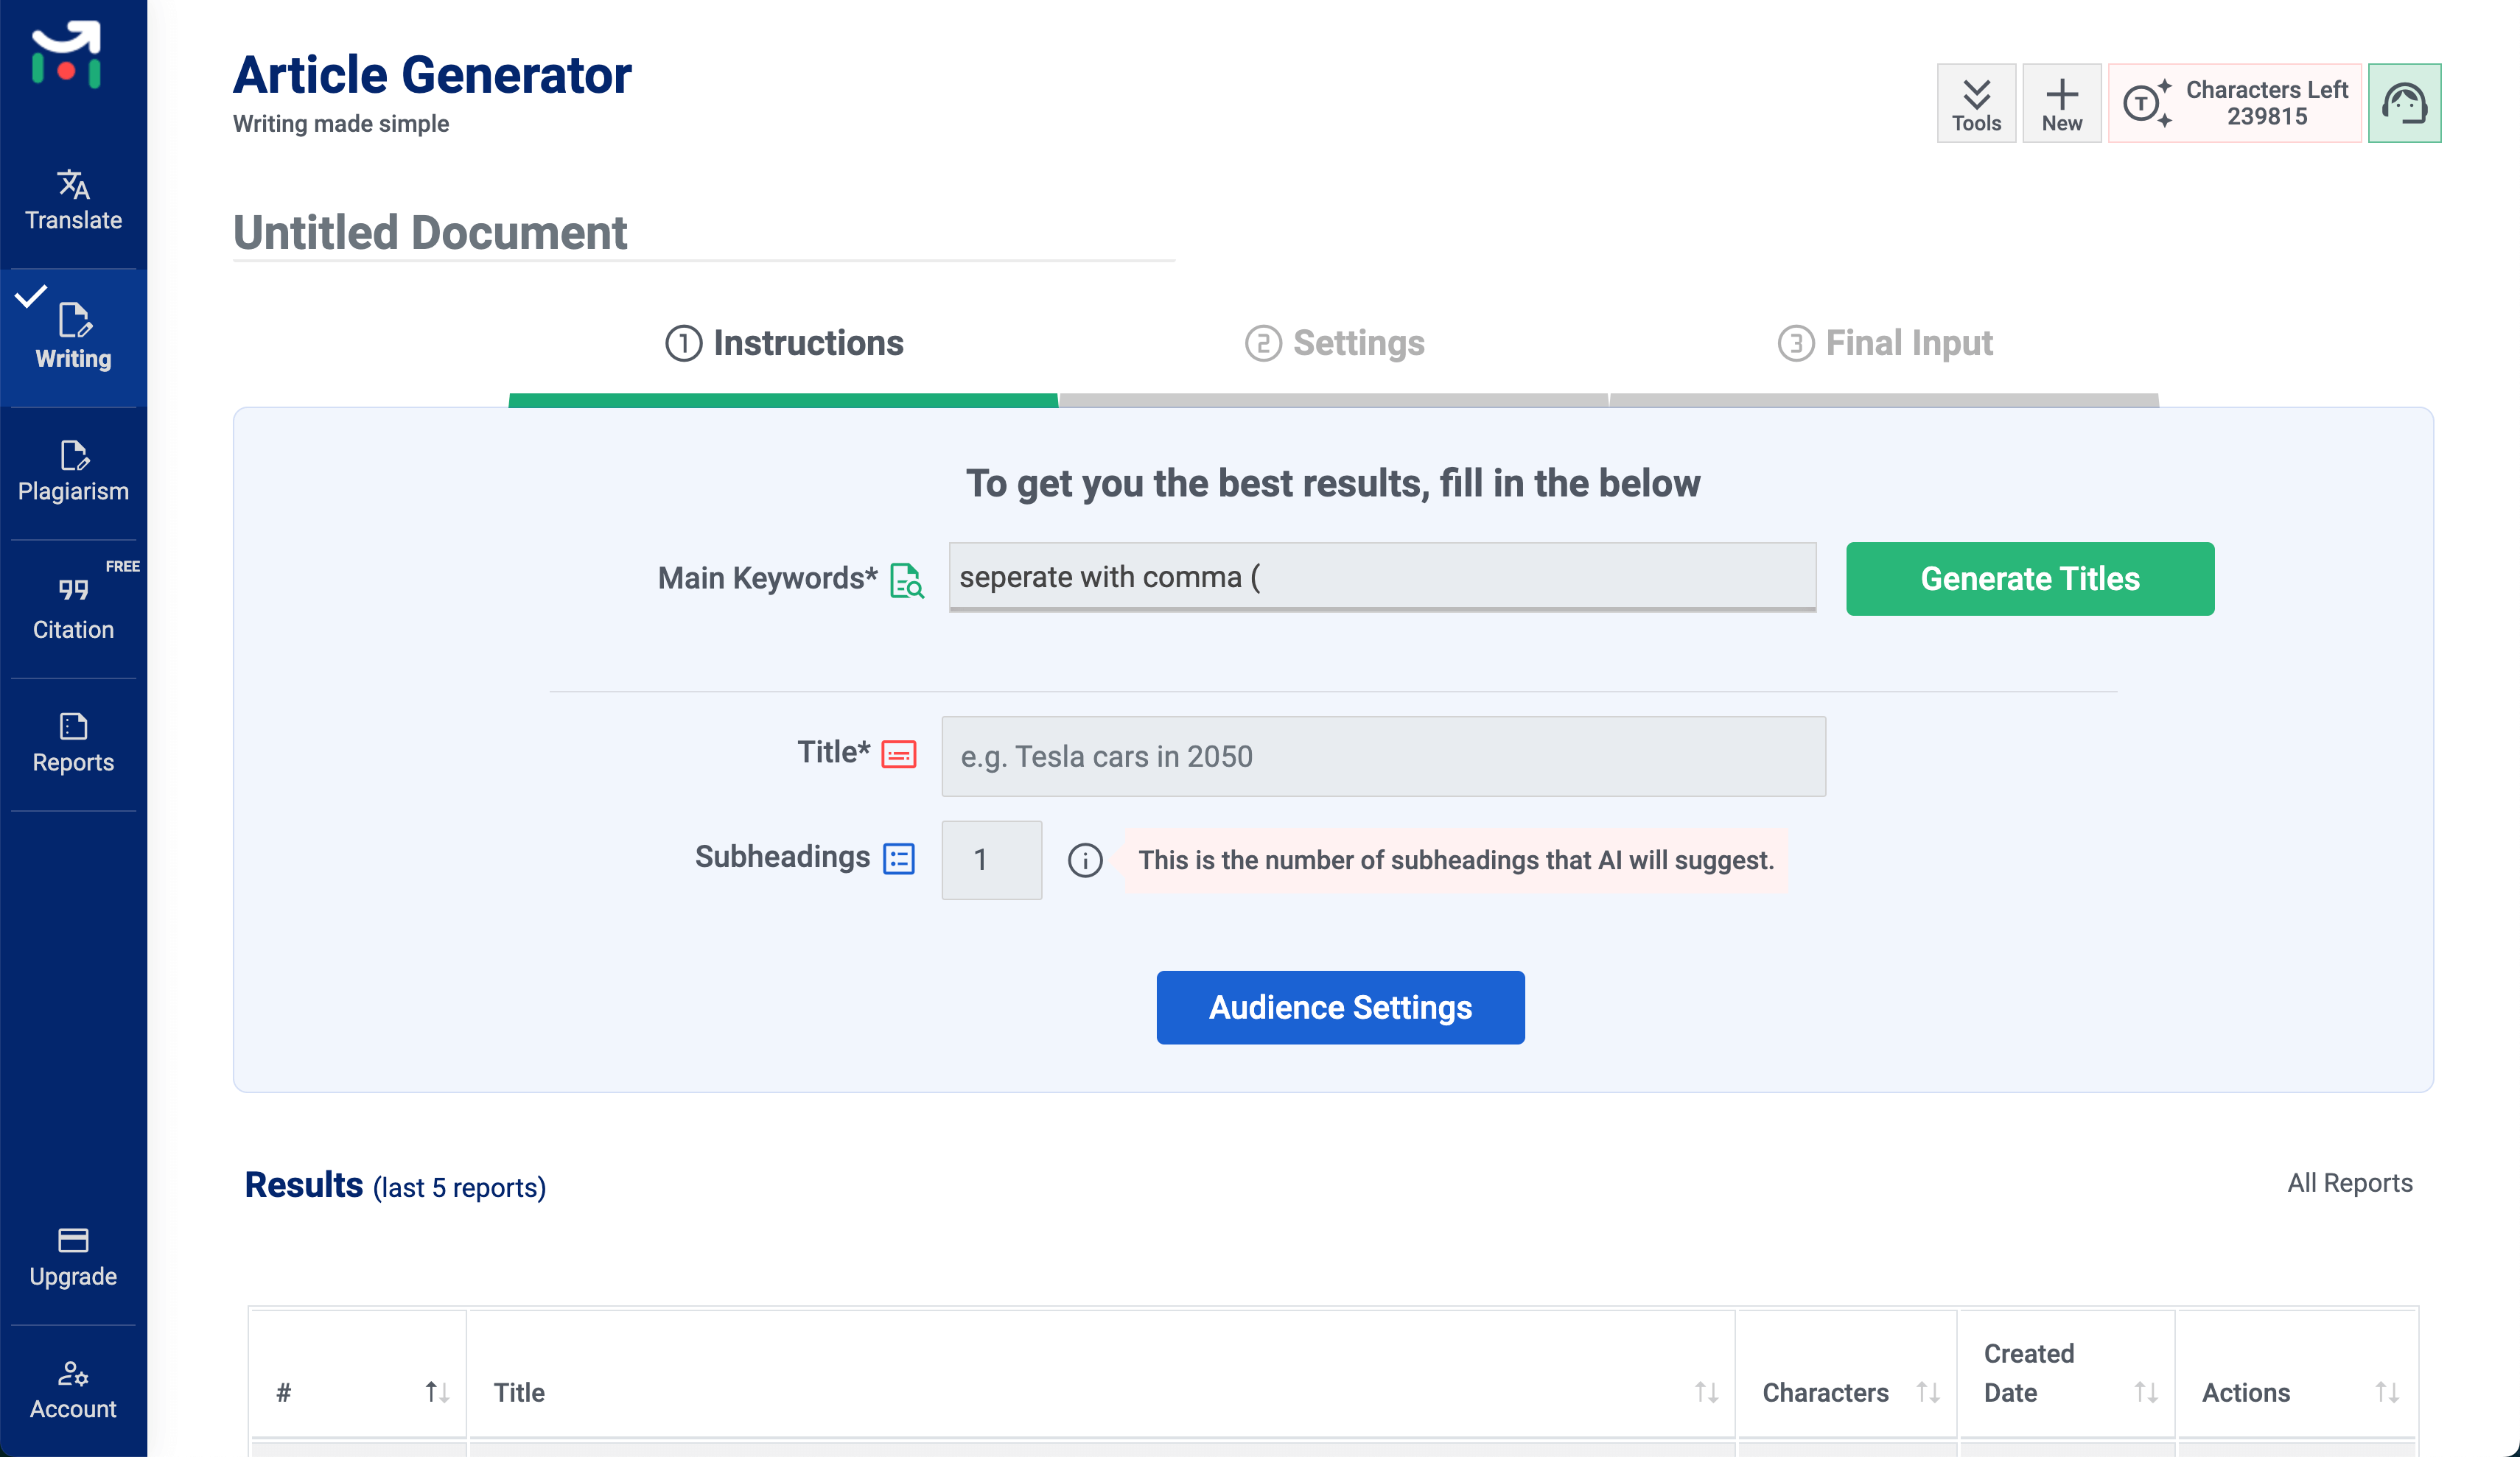
This is the first screen you will see after clicking on “Generate Articles”. Input some important keywords for your article/ blog in the first box and click on “Generate Titles”. It will generate some titles based on your inputs.
Step 3
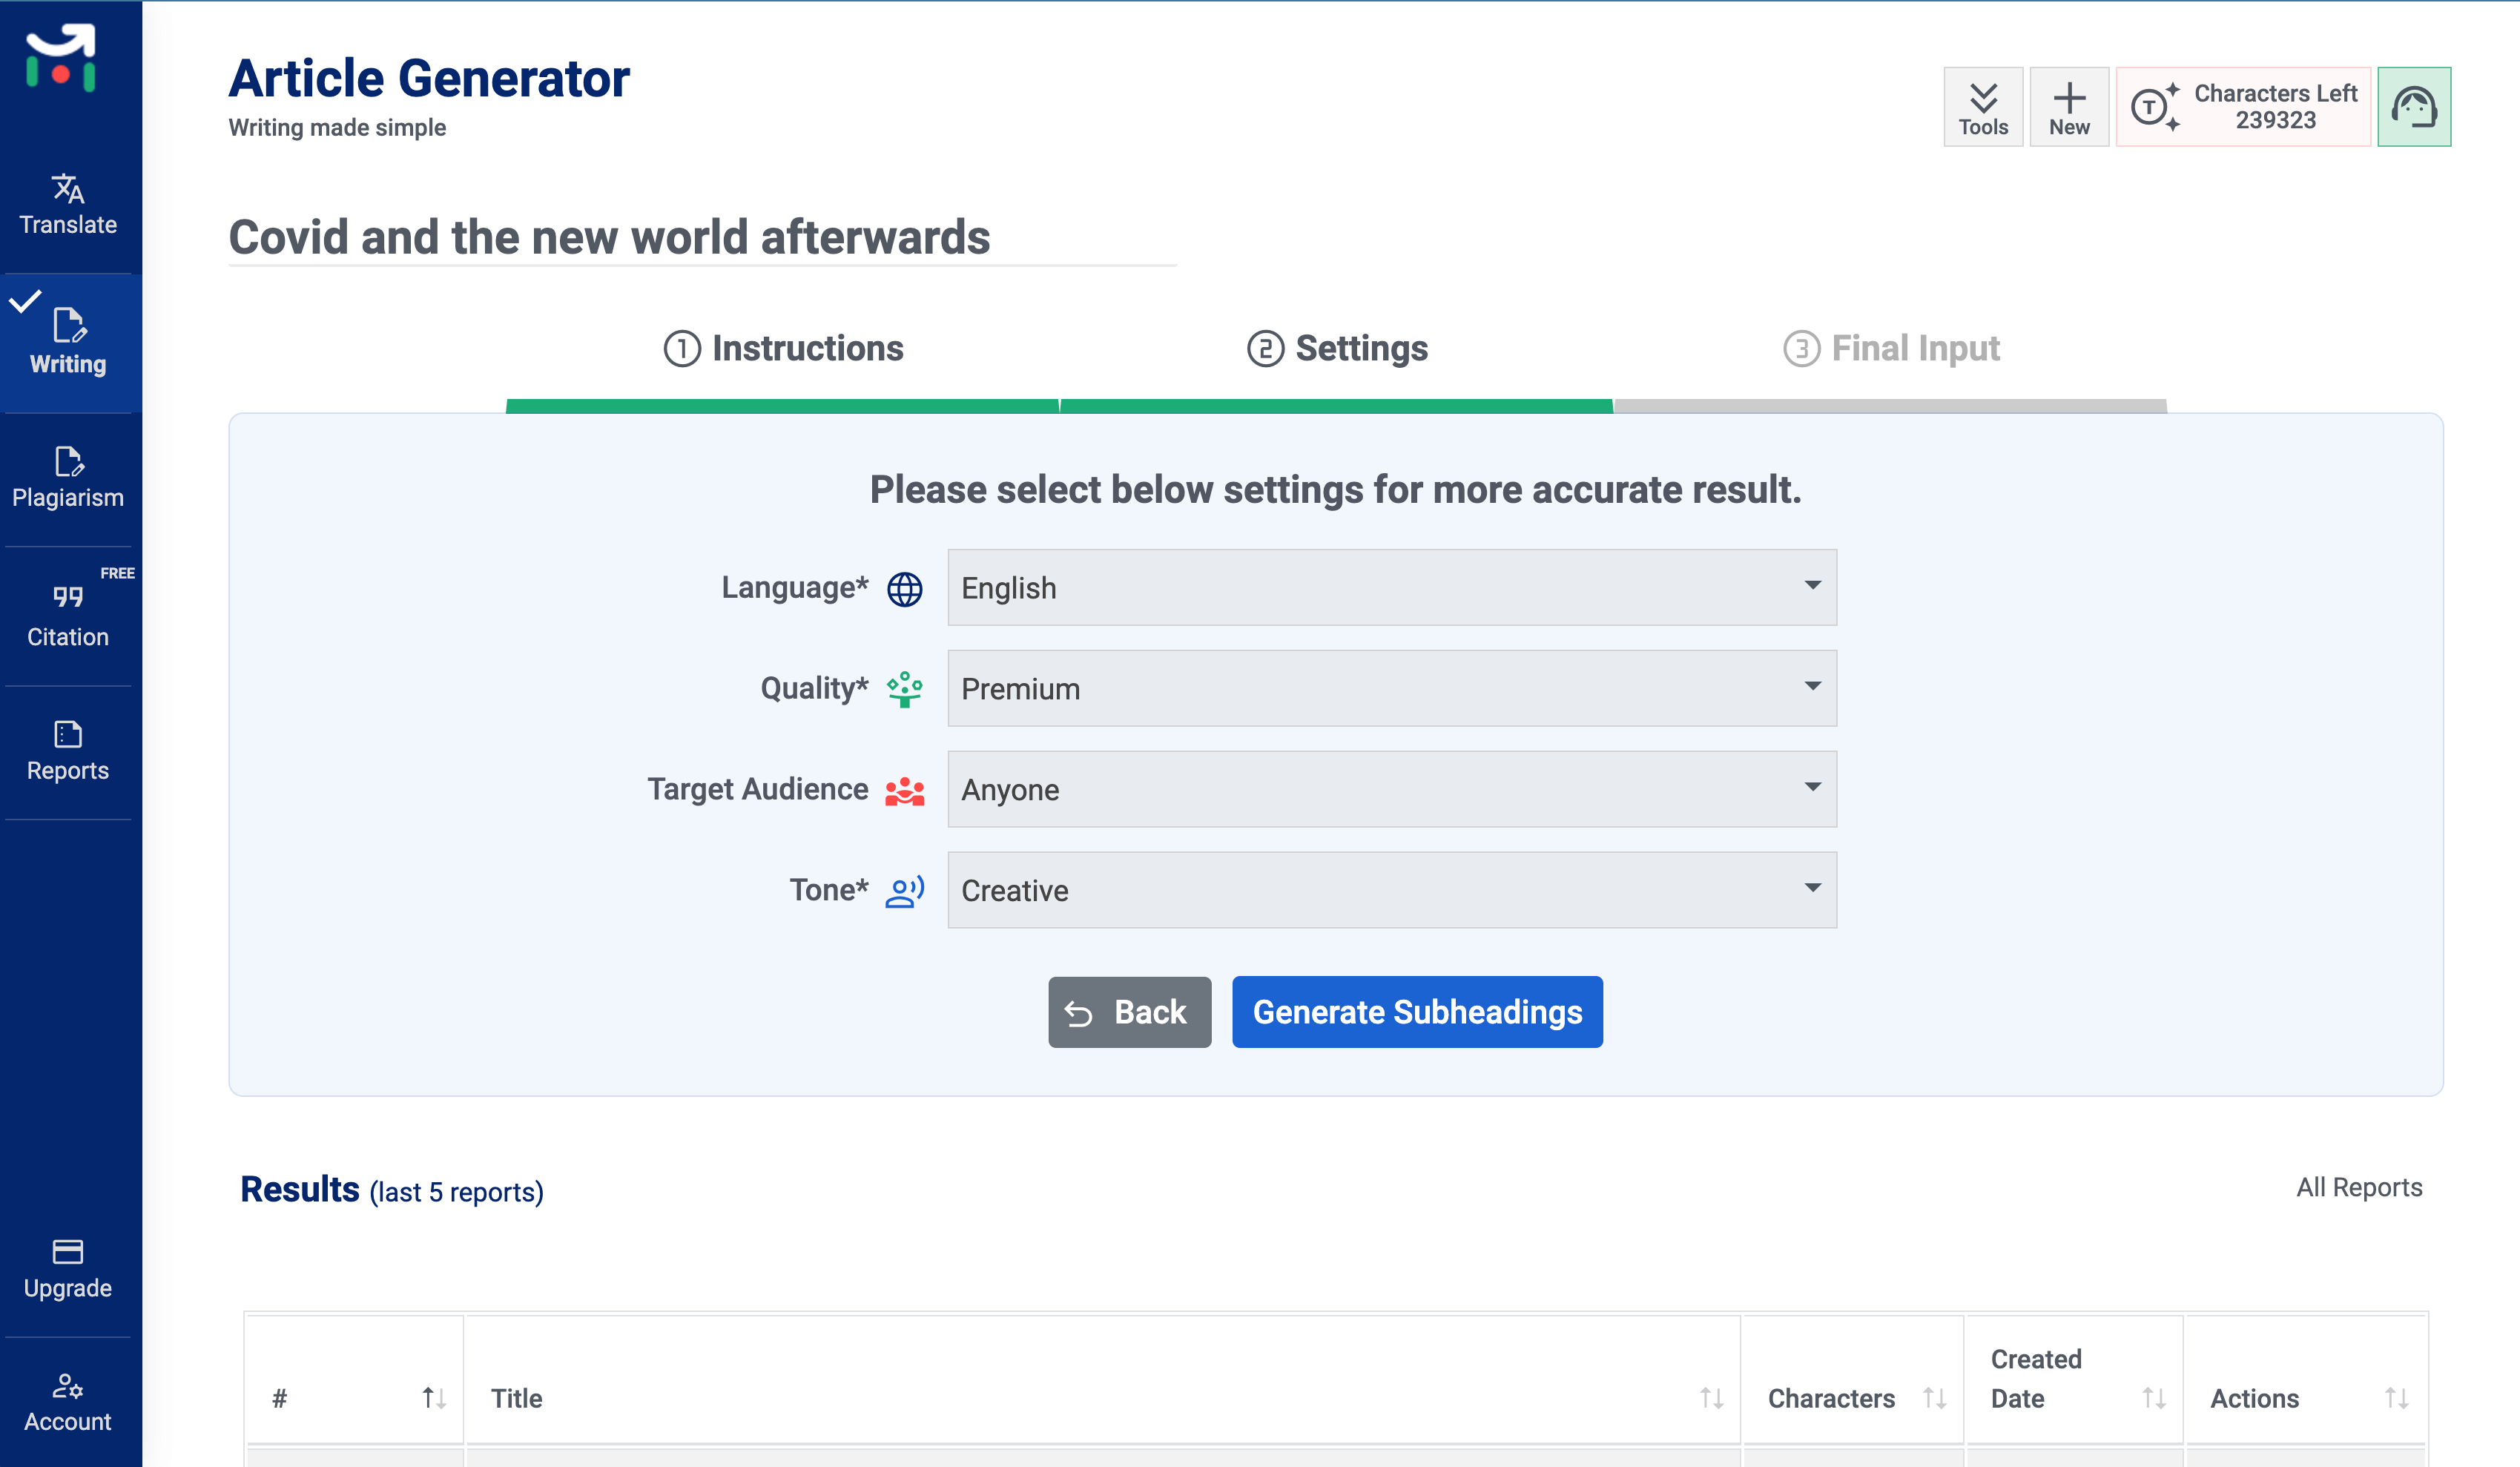
Once the title is generated based on your input, it will show you the below screen. Choose if any of the title suits your subject or write your own title. Next, select the number of subheadings you want on your blog/ article and click on “Audience Settings” to proceed. The next screen for the audience settings is shown below. Select the preferred audience and click on Generate Subheadings.
Step 4
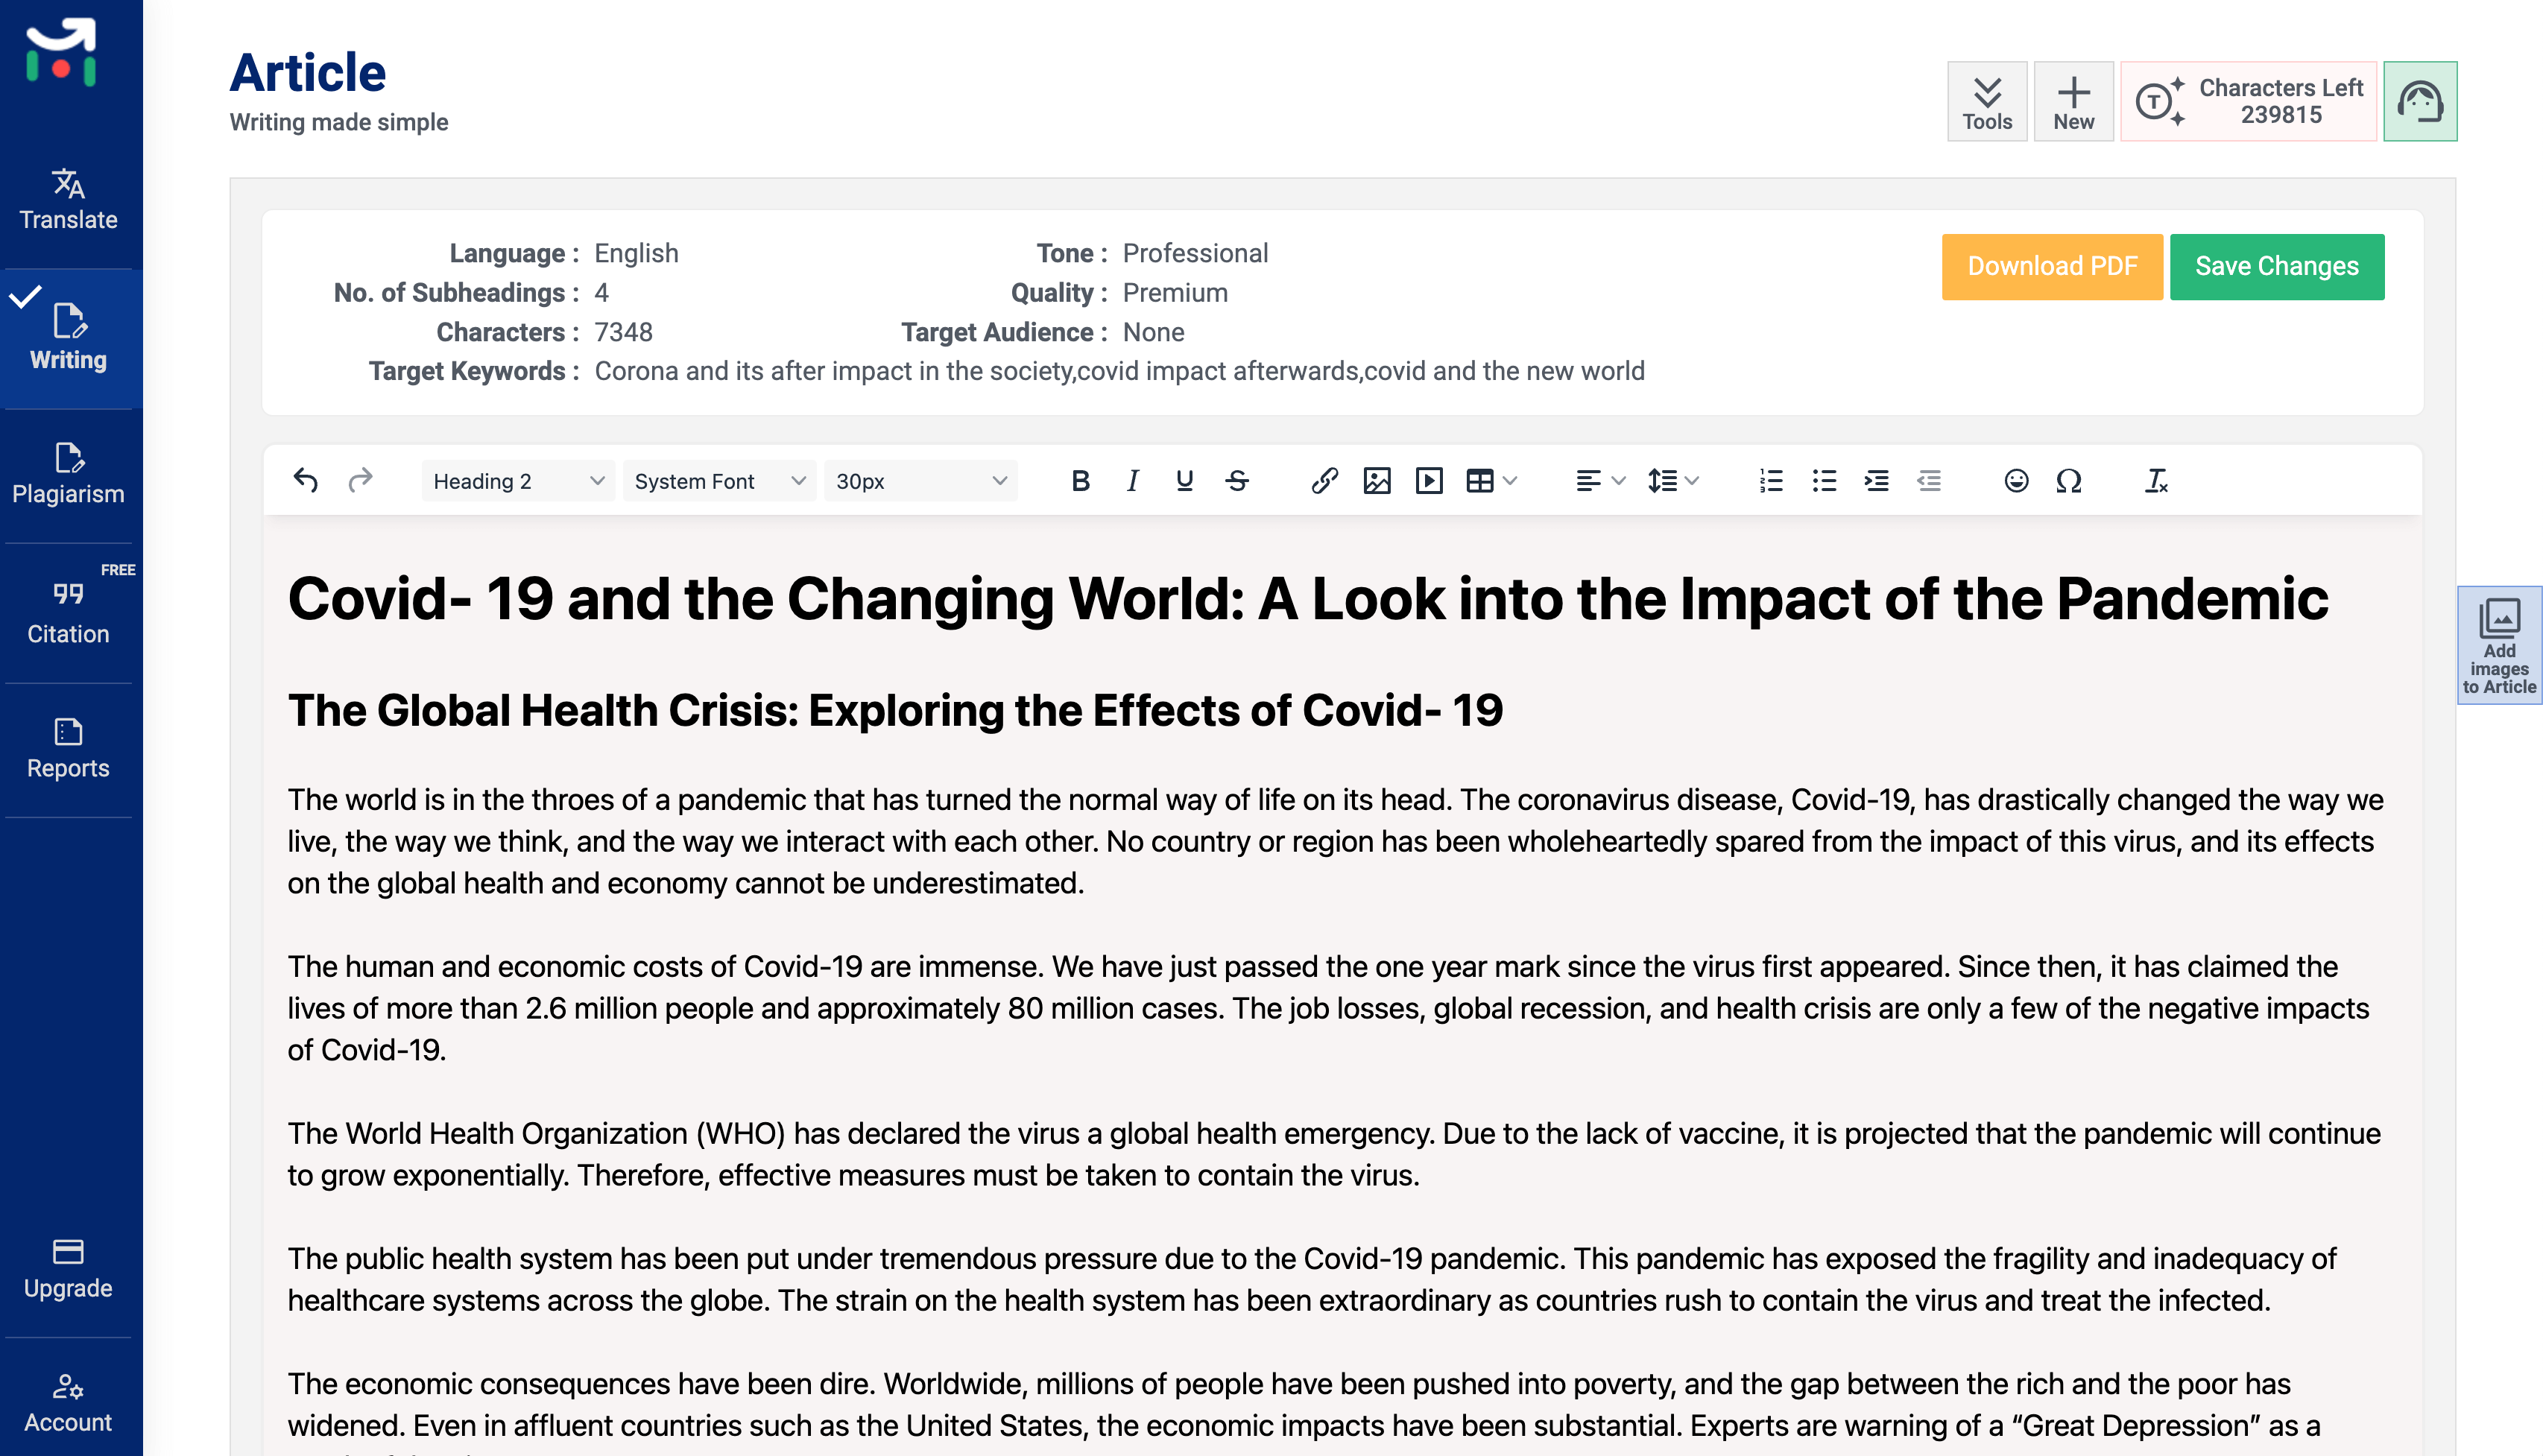
The next screen will show you the generated sub headings. You can choose all of them or delete something you don’t want. You can also add new ones. Once done, click on Generate Article. The new article is shown like this. The article is editable. Once edit is done, click save.
That’s it. If you are a content writer, a teacher or a student, this Article Generator is going to save 75% of your time and give you the most impactful content based on your subject, keywords and audience settings. It’s a win win for you.
Looking to try? Join our 7 Days Free Trial on all our subscription plans and see if this works for you.
Signup for Multilings Today
Are you ready to take the leap? Join us now and choose the plan that is perfect for you –
all it takes is one press of our “Subscribe Now” button!